Flaskでアップロードした画像を加工して返すWebアプリを作る
FlaskはPythonでWebアプリが作れる便利なフレームワーク。
これを使って画像処理するWebアプリを作る。
初めて使うので環境構築から。
1. Flask 環境構築
Anacondaがインストールされている前提。
以下のコマンドでFlaskが使える環境flaskが作られる。
1
2
3
| conda create -n flask python=3.7
activate flask
conda install -c anaconda flask
|
2. Flask 単純なWebページ
「Hello, World!」と表示されるだけの単純なWebページを作る。
さっき作った環境で実験。
- 以下の
test.pyを実行する
test.py
1
2
3
4
5
6
7
8
9
| from flask import Flask
app = Flask(__name__)
@app.route('/')
def hello_world():
return 'Hello, World!'
if __name__ == "__main__":
app.run(debug=True)
|
- 表示されたアドレスをブラウザで開く
プログラムを実行すると以下のようなメッセージが表示される。
1
| * Running on http://127.0.0.1:5000/ (Press CTRL+C to quit)
|
ここに書いてあるhttp://127.0.0.1:5000/をブラウザで開くとこんな感じになる。

さっきのメッセージに書いてある通りCTRL+Cで終了。
3. Flask HTMLファイルを返す
さっきのプログラムはreturnで直接HTMLを返してる。
複雑になると書くのが大変。
render_templateというものを使うと別に用意したHTMLファイルを渡せるので便利。
templatesフォルダを作成してindex.htmlを置く。
以下のようなフォルダ構成となる。
1
2
3
4
5
| flask
│ test.py
│
├─templates
│ index.html
|
index.htmlの中身はこんな感じ。
index.html
1
2
3
4
5
6
7
8
9
10
| <!DOCTYPE html>
<html>
<head>
<meta charset="UTF-8">
<title>Flask Test</title>
</head>
<body>
<h1>Hello, World!</h1>
</body>
</html>
|
test.pyの1行目と6行目を修正して実行。
test.py
1
2
3
4
5
6
7
8
9
| from flask import Flask, render_template
app = Flask(__name__)
@app.route('/')
def hello_world():
return render_template('index.html')
if __name__ == "__main__":
app.run(debug=True)
|
するとこんな感じ。

4. Flask 入力フォームを使う
HTMLに入力フォームを作る。
そこから受け取った情報をFlask経由で表示する。
index.htmlはフォームに入力された文字列をinputという名前でPOSTしている。
その後、送り返されたoutputの中身を展開する。
index.html
1
2
3
4
5
6
7
8
9
10
11
12
13
14
15
| <!DOCTYPE html>
<html>
<head>
<meta charset="UTF-8">
<title>Flask Test</title>
</head>
<body>
<h1>POST Test</h1>
<form>
<input type="text" name="input">
<button type="submit" formmethod="post">POST</button></p>
<p>{{output}}}</p>
</form>
</body>
</html>
|
test.pyはリクエストがPOSTの場合にフォームのinputの中身を取得してpostに入れる。
render_templateでoutput=postとすることでindex.htmlにpostをoutputとして渡している。
test.py
1
2
3
4
5
6
7
8
9
10
11
| from flask import Flask, render_template, request
app = Flask(__name__)
@app.route('/', methods=["GET", "POST"])
def hello_world():
if request.method == 'GET': post = ""
elif request.method == 'POST': post = request.form['input']
return render_template('index.html', output=post)
if __name__ == "__main__":
app.run(debug=True)
|
適当な文字列を入力してPOSTボタンを押すと下に表示される。


5. Flask 画像ファイルをアップロードする
フォームから画像ファイルをアップロードする。
OpenCVを使うと便利なので以下のコマンドでインストールする。
1
| conda install -c conda-forge opencv
|
Flaskではstaticという名前のフォルダに特別な意味がある。
staticの中に置かれたファイルは外からアクセスできる。
今回は画像を保存するためにstaticとimgsを作成。
以下のようなフォルダ構成とした。
1
2
3
4
5
6
7
8
| flask
│ test.py
│
├─templates
│ index.html
│
├─static
│ imgs
|
index.htmlのform部分を修正して画像ファイルを受け取ってimgという名前でPOSTするようにした。
img_pathはFlaskから受け取った画像ファイルのpath。
% if img_path %と% endif %の間はimg_pathがあるときだけ実行される。
index.html
1
2
3
4
5
6
7
8
9
10
11
12
13
14
15
16
17
18
19
20
| <!DOCTYPE html>
<html>
<head>
<meta charset="UTF-8">
<title>Flask Test</title>
</head>
<body>
<h1>POST Test</h1>
<form enctype="multipart/form-data">
<input type="file" name="img">
<button type="submit" formmethod="post">POST</button></p>
{% if img_path %}
<div>
<img src="{{ img_path }}" style="width: 200px;">
</div>
<p>{{ img_path }}</p>
{% endif %}
</form>
</body>
</html>
|
test.pyではフォームからのimgを受け取ってcv2で読み込みimgs/に保存する。
保存した画像のpathをimg_pathとしてHTMLに渡す。
test.py
1
2
3
4
5
6
7
8
9
10
11
12
13
14
15
16
17
18
19
20
21
22
23
24
25
| import cv2
import datetime
import numpy as np
from flask import Flask, render_template, request
app = Flask(__name__)
@app.route('/', methods=["GET", "POST"])
def hello_world():
img_dir = "static/imgs/"
if request.method == 'GET': img_path=None
elif request.method == 'POST':
#### POSTにより受け取った画像を読み込む
stream = request.files['img'].stream
img_array = np.asarray(bytearray(stream.read()), dtype=np.uint8)
img = cv2.imdecode(img_array, 1)
#### 現在時刻を名前として「imgs/」に保存する
dt_now = datetime.datetime.now().strftime("%Y%m%d%H%M%S%f")
img_path = img_dir + dt_now + ".jpg"
cv2.imwrite(img_path, img)
#### 保存した画像ファイルのpathをHTMLに渡す
return render_template('index.html', img_path=img_path)
if __name__ == "__main__":
app.run(debug=True)
|
適当な画像ファイルを選択してPOSTボタンを押すと下に表示される。


6. Flask OpenCVを使ってバックエンドで画像処理
フォームから送られた画像をバックエンドで画像処理して返す。
test.pyに画像処理部分を2行追加。
cv2で輝度を反転。
test.py
1
2
3
4
5
6
7
8
9
10
11
12
13
14
15
16
17
18
19
20
21
22
23
24
25
26
27
28
| import cv2
import datetime
import numpy as np
from flask import Flask, render_template, request
app = Flask(__name__)
@app.route('/', methods=["GET", "POST"])
def hello_world():
img_dir = "static/imgs/"
if request.method == 'GET': img_path=None
elif request.method == 'POST':
#### POSTにより受け取った画像を読み込む
stream = request.files['img'].stream
img_array = np.asarray(bytearray(stream.read()), dtype=np.uint8)
img = cv2.imdecode(img_array, 1)
### 画像処理
img = (img * -1) + 255
img = np.clip(img, 0, 255).astype(np.uint8)
#### 現在時刻を名前として「imgs/」に保存する
dt_now = datetime.datetime.now().strftime("%Y%m%d%H%M%S%f")
img_path = img_dir + dt_now + ".jpg"
cv2.imwrite(img_path, img)
#### 保存した画像ファイルのpathをHTMLに渡す
return render_template('index.html', img_path=img_path)
if __name__ == "__main__":
app.run(debug=True)
|
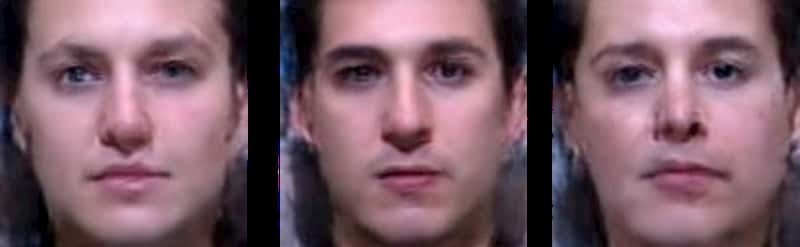
こんな感じになる。

画像処理の内容を変えたら色々できる。
CNNとか使うと重そう。
7. 参考
https://flask.palletsprojects.com/en/1.1.x/quickstart/